Deploying a Python Website to Azure with Docker
This post will cover how to deploy a Python Website to Azure Web Apps for Linux using python. With the release of Web Apps for Linux it makes it easier to deploy any application to Azure Web Apps.
Before Web Apps for Linux there needed to be explicit support for a language in Azure or you had to create a complicated Kudo Extention to enable a language. For many languages, it also means you need to use the Windows specific distribution which often had issues with 3rd party libraries not supporting windows (although this is getting better now).
This tutorial will walk you through how to create your first Python Flask Website but if you already have an existing Python website (either Flask, Django or any other framework) you can skip to the step where you Add a Dockerfile. I assume you have Python and Docker installed.
This post is a bit long but the steps are quite simple:
- Create Python Website (optional if you have an existing app)
- Add a Dockerfile
- Build your docker image
- Publish your docker image to a repository
- Create and Configure Azure Web App for Linux using your custom docker image
If you’re looking for complete samples, here is the Flask Example from this tutorial and Django example.
Create your Python Website
I will use Flask in this example but you could use Django or any other python web framework you would like.
Create files
First, from the command line create a new directory for your application,then move into the directory:
mkdir flaskwebapp
cd flaskwebapp
Next, create two files: app.py and requirements.txt
touch app.py
touch requirements.txt
Add Python Code
Open app.py in your favorite editor (I use VS Code) and paste in the following code:
from flask import Flask
app = Flask(__name__)

@app.route("/")
def hello():
    return "Hello from an Azure Web App running on Linux!"

if __name__ == "__main__":
    app.run(host='0.0.0.0')
This creates a simple Flask site with one route that displays a simple hello world message. You can learn more about Flask at the Flask Website.
Note:
app.run()passes a argument calledhostwith a value of0.0.0.0. This is important for working with Docker. You can learn more about it in this stackoverflow answer.
Add your requirements
Open requirements.txt and add the following:
Flask
This will be used by Pip to install the Flask Library.
Run your site
Finally, you can make sure you site runs by running the following in a command line:
pip install -r requirements.txt
python app.py
If you navigate to localhost:5000 you will see your new website. Congrats you just created your first Flask app!
Add a Dockerfile
The first step to getting your app ready to run Azure Web App for Linux using Docker is to add a Docker File. When I was creating this tutorial I found a great plug-in for Visual Studio Code that makes working with Docker easy from VS Code. If your using VS Code I would recommend checking it out.
In the root directory of your Python App (again can be any framework you like but if you following along with the tutorial we used Flask) create a file called Dockerfile:
touch Dockerfile
Open this file and add the following:
FROM python:3.6

RUN mkdir /code
WORKDIR /code
ADD . /code/
RUN pip install -r requirements.txt

EXPOSE 5000
CMD ["python", "/code/app.py"]
This Dockerfile uses the official Python Base image. The Dockerfile then creates a folder code and copies all the files from the current directory into the docker image. Next, it runs pip which installs all the library dependencies from the requirements file (in the case of this tutorial that would just be Flask). It opens the port and finally runs the command that launches the website.
The Dockerfile above exposes port 5000 and calls the command python /code/hello.py which works great for our flask app but you may need to tweak the last two lines to get it to work for another framework. For instance, if you wanted to run a Django app you would need to replace those two lines with:
EXPOSE 8000
CMD ["python", "/code/manage.py", "runserver", "0.0.0.0:8000"]
You can find the specific command to launch your app in your framework documentation.
Note: With Django, we are again binding the app to the
0.0.0.0IP address so that it can be exposed to the outside world through docker. This is slightly different location than we are doing with the binding in the case of Flask.
Build your Docker Image
To get your app ready for Deployment on Azure you need to build your docker image from your dockerfile. Run the following from your command prompt in the folder where you created your Dockerfile:
docker build -f Dockerfile -t flaskwebapp:latest .
This will download the Python base docker image (if not already local), perform the actions in your Dockerfile (copy the files/run pip/etc) and then tag the new docker image as flaskwebapp.
To actually run and test your new docker image, run the newly created image using docker and you should get an output like the following:
docker run -p 5000:5000 --rm flaskwebapp
#should get output similar to this:
  * Running on http://0.0.0.0:5000/ (Press CTRL+C to quit)
You can now navigate to localhost:5000 and you should see your Flask App running inside a docker container.
Publish your Docker Image
The next step is to publish your docker image to a location where Azure Web Apps can pull the image to use inside Azure Web App environment. If your app is open source then you can host it in the public Docker Hub, which is what will do for this tutorial. Otherwise, there are many options for hosting a private Docker image such as Docker Hub or Azure Container Service.
To publish it to Docker Hub make sure you have already signed up for an account.
First, find the image id by running docker images and looking for flaskwebapp container id:
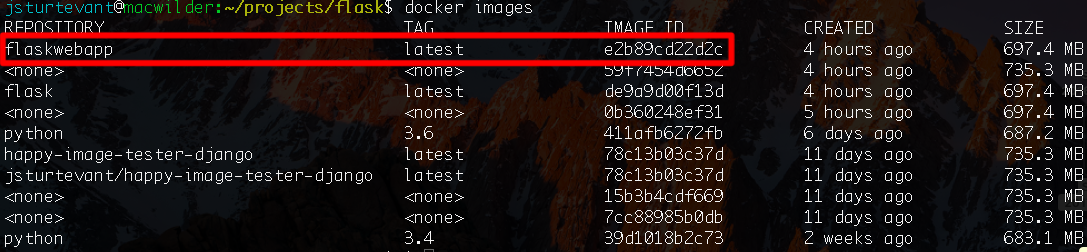
Next, you can tag the existing image with your Docker Hub username, using the following command with the id you just located (important: replace the id and user name below with yours):
docker tag e2b89cd22d2c jsturtevant/flaskwebapp
Now that you have tagged your image you need to login into Docker Hub and push the image to docker hub:
docker login #follow prompts for login
docker push jsturtevant/flaskwebapp
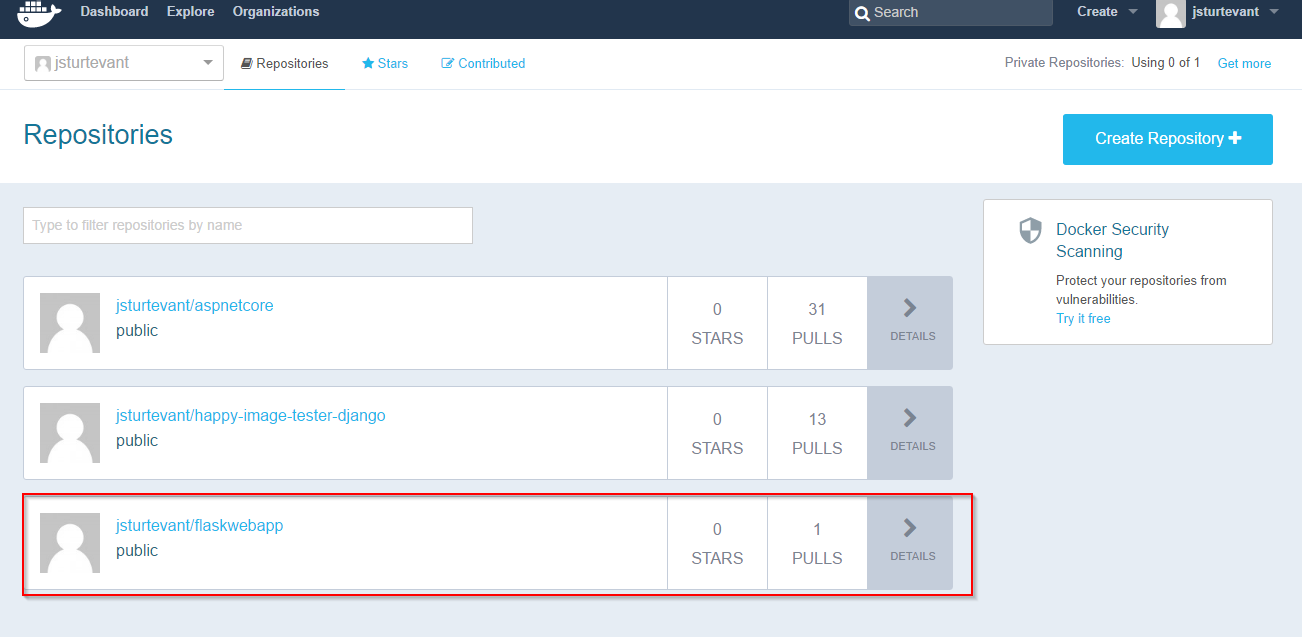
You should now see the image on your docker hub repository:
Create and Configure your Azure Web App
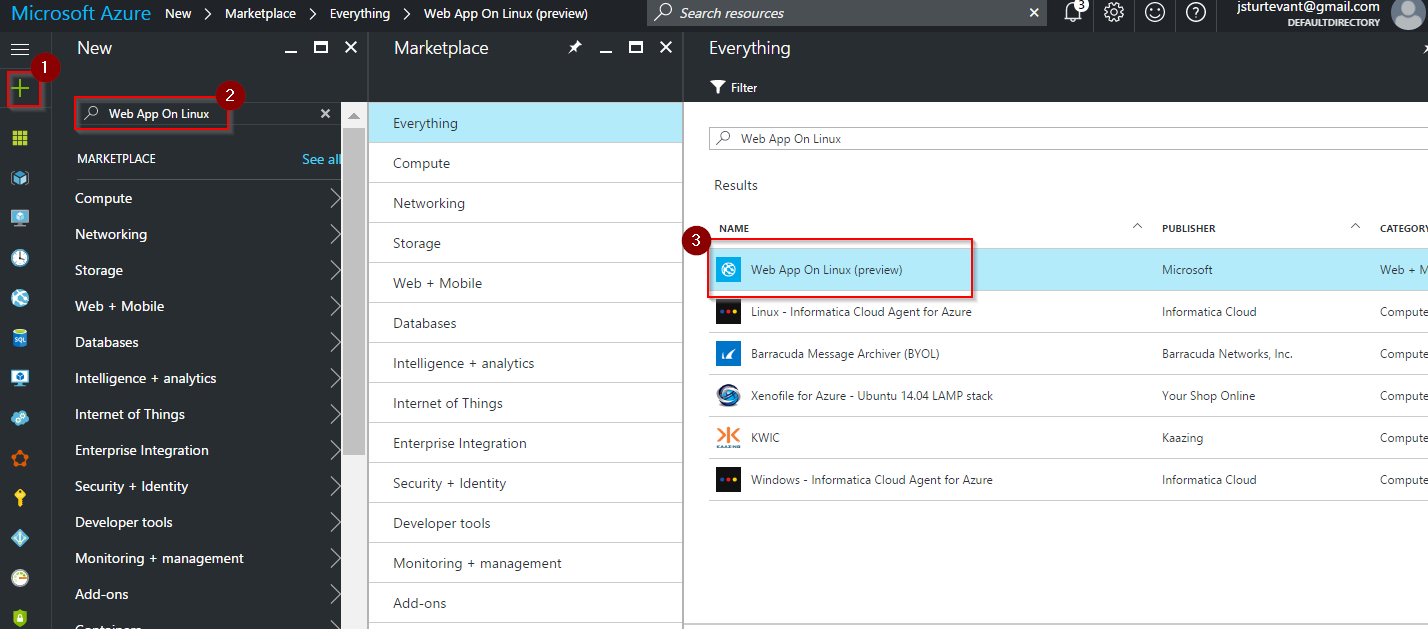
Inside the Azure portal click the Add (+) button in the top left corner and search for Web App for Linux:
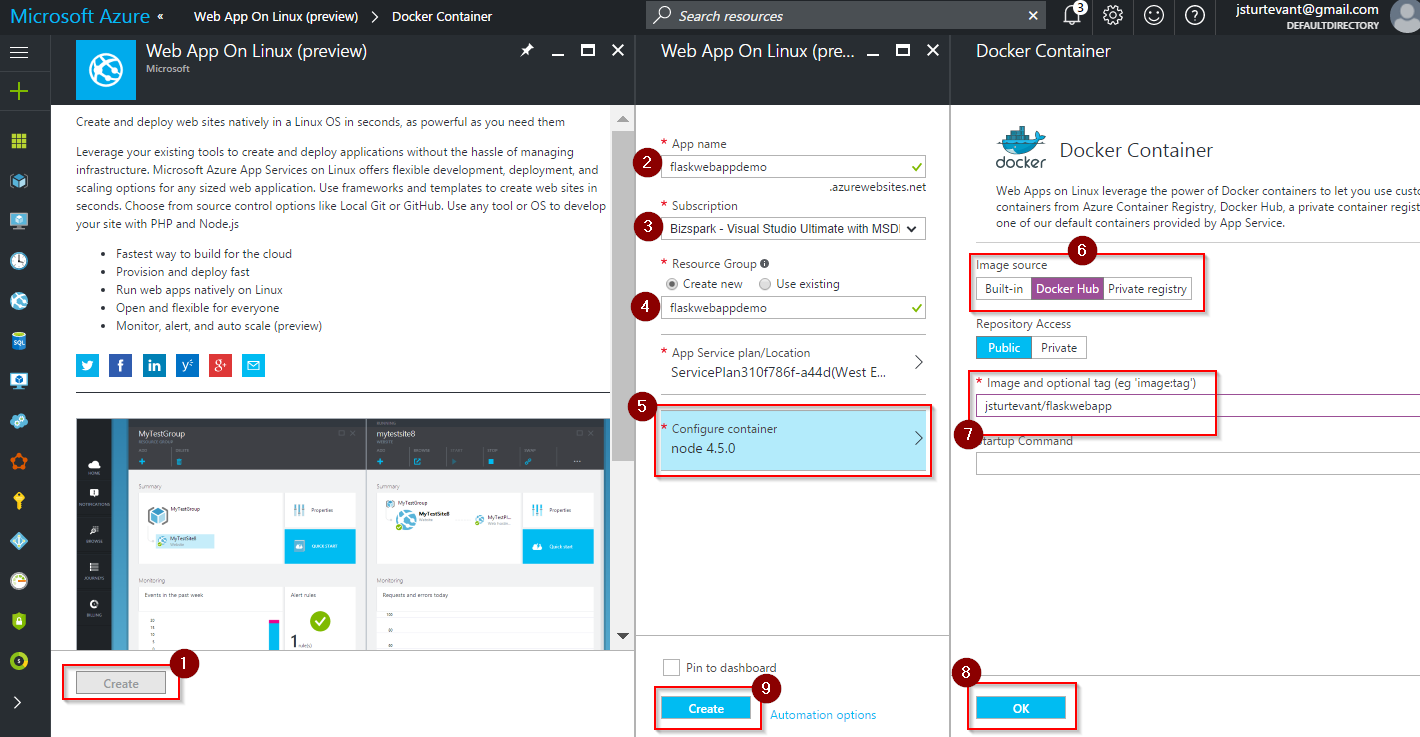
Next, Click Create, fill in the app name, subscription, resource group and App Service as in the image below.
When you get to the Configure Container Section click on it to open a new blade. You then have the option to use a preconfigured image, Docker Hub, or private Registry. In this example, we will choose Docker Hub and then fill in the image name with the docker image name we just pushed in the previous step (in my case jsturtevant/flaskwebapp).
Click Ok and then Create. Azure will then create the Web App for Linux using your custom image!
We are not completely finished though because we need to configure Azure to use port 5000 that we specified in our Dockerfile.
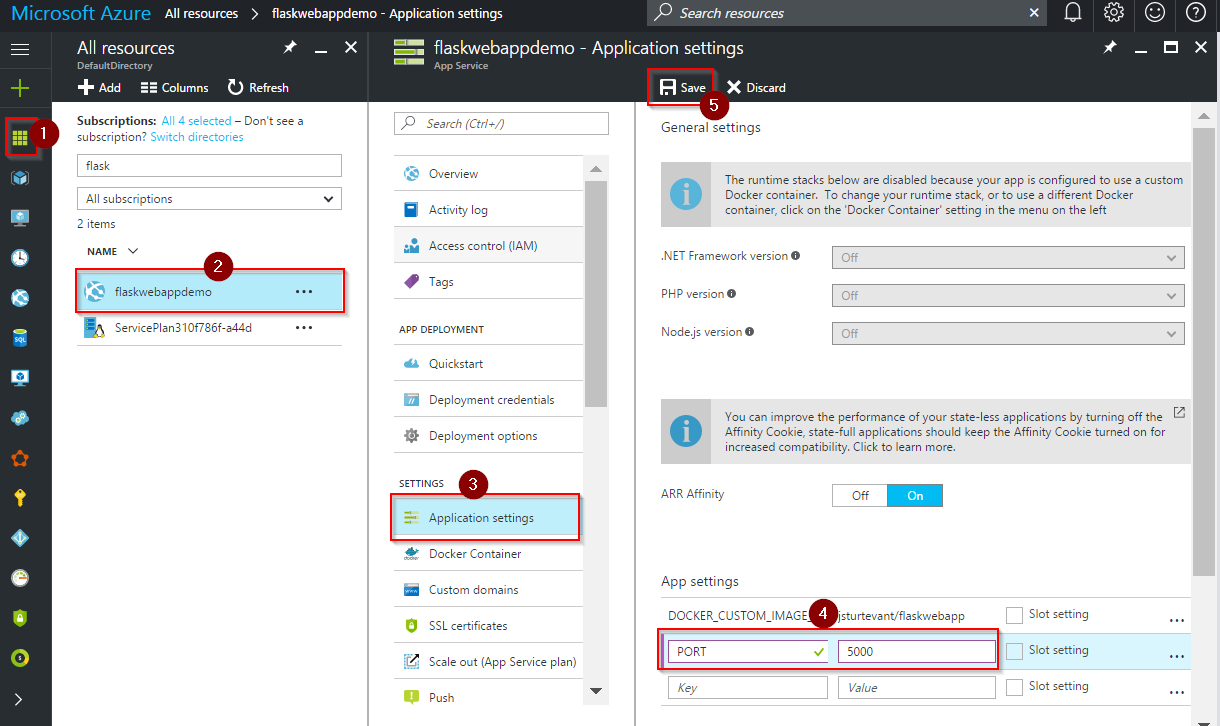
Once the Web App is published we can navigate to the Web App dashboard by clicking on All Resources, Selecting the Web App you just created, then Clicking on AppSettings.
Once you are in the Application Settings blade you can add an App Setting key of PORT with a value of 5000. Click Save at the top.
Note: If you need to set environment variables for your application this is also where you set them. Azure will take care of passing the environment variables through to your docker container.
Now you can navigate to your new Azure Web App (http://yourappname.azurewebsites.net/) and see your project!
Conclusion
In this tutorial, we created a new Flask Web app, added a Dockerfile and then deployed the built image to an Azure Web App for Linux. Although this tutorial was for Flask, you could easily make a few changes for your favorite python framework. And the same basic principles would work for any language (node.js/Go/Elixir/etc.).
You can see a complete Flask example from this tutorial and Django example here.
Comments